The previous blog post detailed the FreeBSD installation and the one before introduced the OS in general.
This one is going to show you around a little bit. There’s a lot to see here – so let’s jump right in!
Convenient access
Let’s start the VM with the fresh FreeBSD installation and login as root. The Virtualbox graphical console does allow you to work with your VMs but it is not a convenient way: You cannot copy just some lines of configuration into the buffer or paste a longer command to execute. Also if you’re like me and use an optimized keyboard layout, chances are that in VBox you’ll have to use US or any standard keymap.
Or maybe you want to scroll up your terminal when you need to see what that strange output five minutes again was. Sure, you can do that in a Virtualbox console, but it’s much more comfortable using the mouse. When you’d try SHIFT-PG UP or SHIFT-PG DOWN like on a Linux system it won’t work BTW. FreeBSD has its own scrolling mode which you can enable/disable pressing the scroll lock key.
And of course it’s always nice if you can see multiple logins at once – say with split-screen tmux. You can switch to another TTY with CTRL-ALT-Fx on FreeBSD just like in Linux. In Virtualbox you use right CTRL and one of the Fx keys. That works but you can’t see two or more logins at the same time.
Anyways: There are more than enough perfectly valid reasons to get rid of Virtualbox’s graphical console. So let’s just do that. But first we have to edit the configuration file for the ssh daemon:
# vi /etc/ssh/sshd_config
Find the line #PermitRootLogin no, remove the comment sign and change it to yes. Save and exit vi.
Now we’d have to restart the ssh daemon for the changed config to be applied. But we won’t do that. Instead we’ll just power down the machine. You can do that as you’re most likely used to from Linux:
# halt
A moment later you’ll see something like this:
All buffers synced.

Uptime: 50s
The operating system has halted.
Please press any key to reboot.
This is FreeBSD’s way of saying: “Alright, I’ve finished. You can safely power off the machine now”. Close the VM.
Note: To properly power off your FreeBSD machine you should use the shutdown command instead of halt or reboot as that will try to stop running services instead of just killing them. Shutdown can take the parameters -p to power down or -r to reboot the machine respectively. Thanks, TK, for reminding me of that as it really is something that a tutorial reader should know!
Now click on settings for your VM, choose network and click on advanced. Then click the button labeled Port Forwarding. In the new window add a new rule and enter 22 (the default port for SSH) as the guest port. Redirect it to any free port (higher than 1023) on your host machine – I’m using 20022 here.
 Port forwarding rules for Virtualbox
Now let’s start the machine again. But since we don’t want the graphical console, let’s start the VM without it. Virtualbox offers something called headless mode which does just that: Start a VM in the background without a console for it. You could do so on the command line – but did you know that more recent versions also allow you to do this by double-clicking a VM while holding down SHIFT? Try it out!
Look at what Virtualbox calls the “preview” to watch the boot process and see that it is really starting. When it has booted up, it’s time to connect. User your favorite terminal to issue the following command:
$ ssh root@localhost -p 20022
You’ll then be prompted for the root password and then – there we are!
Alright! I don’t have to tell you that in general it is a very bad idea to enable root login for SSH – even more so if you allow logging in with password. But here for our purpose of just playing around on a non-production system it’s fair enough.
And what if you did something funny to your host’s ssh configuration and it won’t connect? Well, SSH problems are a special topic of their own. But here’s one not to miss: Whenever you run in trouble, be sure to include the “-v” switch for verbose output. This is bound to give you some hint at what is happening (and an idea what to search for with your preferred search machine if don’t know at all).
Welcome to FreeBSD!
That’s what your terminal is probably saying right now (if you’re just reading this post without following along, have a look at the screenshot).
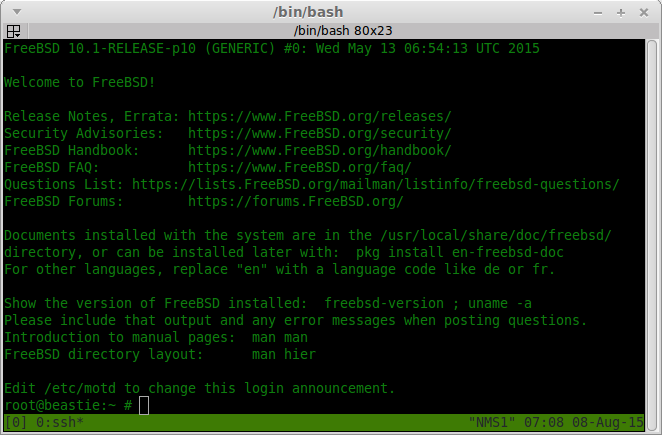 Connected to the headless VM using SSH
Release notes and security advisories are probably not of too high importance for you if you’re new to FreeBSD. But I cannot recommend the handbook enough. It covers a large part of the system in detail and starts at a rather low-level (even for people without much command line experience). It is extremely helpful if you want to find your way around with FreeBSD. Have a look – and take your time reading. Really.
Don’t just jump at the forums. You are not ready for them, yet. Sure you’ll face problems. But this is Unix not Linux. kindergarten’s over. Learn to stand on your own feet and use your brain when you run into trouble. People in the forums will probably be happy to help you if you’ve read the handbook, FAQ, did some research on the net and still have no clue how to solve your problem. Do NOT consider it the first place to look for help! If the information you need is on the net and can be found easily then you’d steal everybody’s time asking stupid questions (and make yourself look like a dumbass at the same time).
Oh, and you may want to get used to consulting the man pages if you haven’t already. You may know that those exist from Linux but you may just have lived happily without them. They are a great resource of information. Embrace them and immediately benefit from the knowledge that they hold (without having to ask somebody and wait for an answer)!
Console commands
Use CTRL-L to clear the screen. Let’s see what FreeBSD can do! whoami, pwd, etc. You know the score. They all work and do what you’d expect.
Now let’s create two directories:
$ mkdir -p test/directories
Works like a charm. But perhaps we don’t really want them so let’s delete them again:
$ rm test
rm: test/: is a directory
Ah, stupid me. That command does not remove directories if it’s not given the -r switch! So let’s try again; the up-arrow key brings back the previous command so I can just append the missing switch. Now that should work, shouldn’t it?
$ rm test -r
rm: test/: is a directory

rm: -r: No such file or directory
What the…?! Why is stupid rm interpreting the switch as a file? This should work, right? Nope, rm is reacting just fine, it’s really my bad. But it does work on Linux, doesn’t it? That’s correct. So what’s happening here? In fact the above line is syntactically wrong. You should always state: 1. command, 2. option(s), 3. parameters. When rm met the first parameter (“test”) here, it stopped expecting options and thus treats “-r” as another parameter. And that’s fine – there could be a file “-r” after all as that’s a perfectly legitimate file name!
$ rm -r test
No surprise here: This works.
Lesson 1: FreeBSD is much more strict while Linux (with its GNU tools) lets you get away with a lot of strange things. Some people say that this makes GNU/Linux more “friendly” but that totally depends on how you look at it. What if you want to remove the files “test” and “-r” in GNU-land? It’s possible there, too. But you have to type this:
rm -r -- test -r
The double dash tells rm to stop parsing options and treat every following input as a parameter. Works just as well, for sure. But you need to know how to use the double dash or you can run into pretty bad edge cases without a clue what’s going on. The BSD way of doing things is not aiming at this kind of “friendliness” but just doing things right in the first place.
 Mind the syntax!
Let’s take a look at what df can tell us. Except for the device name there’s nothing too strange here. If you wonder how that device naming works, you may take a look at my previous post, where I explained it in section “Excursion: Partitions and *BSD”.
But there is one special thing about df which you might run into if you decide to do some *BSD: Capacity can go over 100%! Yes, you can come across e.g. the root partition being at 105% or something like that. This is not an error in df – it is something that is conceptionally different. FreeBSD reserves 8% of disk space for the OS and root and df considers the complete space minus the reserved space to be 100%.
The shell
Now let’s try to play a little with environment variables. Setting and displaying one should be easy, no?
$ export ALL_FINE=”sure!”
export: Command not found.
Uh, what’s happening here? The system doesn’t know about export! Do you know what it belongs to? Try running which export on any Linux system. You won’t find it there either. What a mysterious case! Ok, not really. Export is an internal command provided by bash, the standard shell of most Linux distributions. FreeBSD uses another default shell, so let me introduce: The C-Shell (csh)!
 Different shell: csh.
The most important thing that you need to know about the C-Shell is that it is fundamentally different in many ways. I’ll just show setting an environment variable here to show off something; the whole topic is huge and if you care enough, you should easily find something helpful to read. But we’ll simply be installing bash later in this tutorial. Why? Because there’s enough to learn for FreeBSD anyway and it doesn’t hurt if people can at least explore with a shell they know and feel comfortable with.
$ setenv ALL_FINE “sure!”
This is what the csh expects if you want to set an environment variable. Mind the missing equals sign! And if you want to display all the variables currently present, just run setenv without any parameters.
What’s next?
This post tried to give some very basic information for you to get along on FreeBSD systems. In the next two parts we’ll have a look at user, package and service management, system configuration, ports and updating the system.

Use “shutdown -p now” to power down your machine. halt and reboot do not shutdown services gracefully but just kills them!
You’re right of course and I normally do that when I work with production servers. However I’m kind of lazy and still use the shorter command on “unimportant” machines. Guess that I should not have done that in a tutorial, though! So thanks for pointing it out, I will edit the article.